Introduction
Most companies typically create a Quotation, converting it into a Sales Order upon agreement with a customer, which is then converted into an Invoice upon preparation of the goods and services requested.
This article covers how to create an Invoice, which is issued to a customer to communicate the sale of goods and services along with payment deadlines. Invoices are also used to keep track of payments owed in your internal accounting records.
Before you begin
DashBod enables you to create Quotation, Sales Order, and Invoice independently of each other. Check with your company’s sales management process if there’s a need to create a Quotation or a Sales Order first.
You will also have to create the Customer Profile first before creating the Invoice
Converting a Sales Order to an Invoice
Navigating to Sales Orders page
1. Click on Sales at the left panel
2. Click on Sales at the top bar
3. Click on Sales Orders
Converting the Sales Order
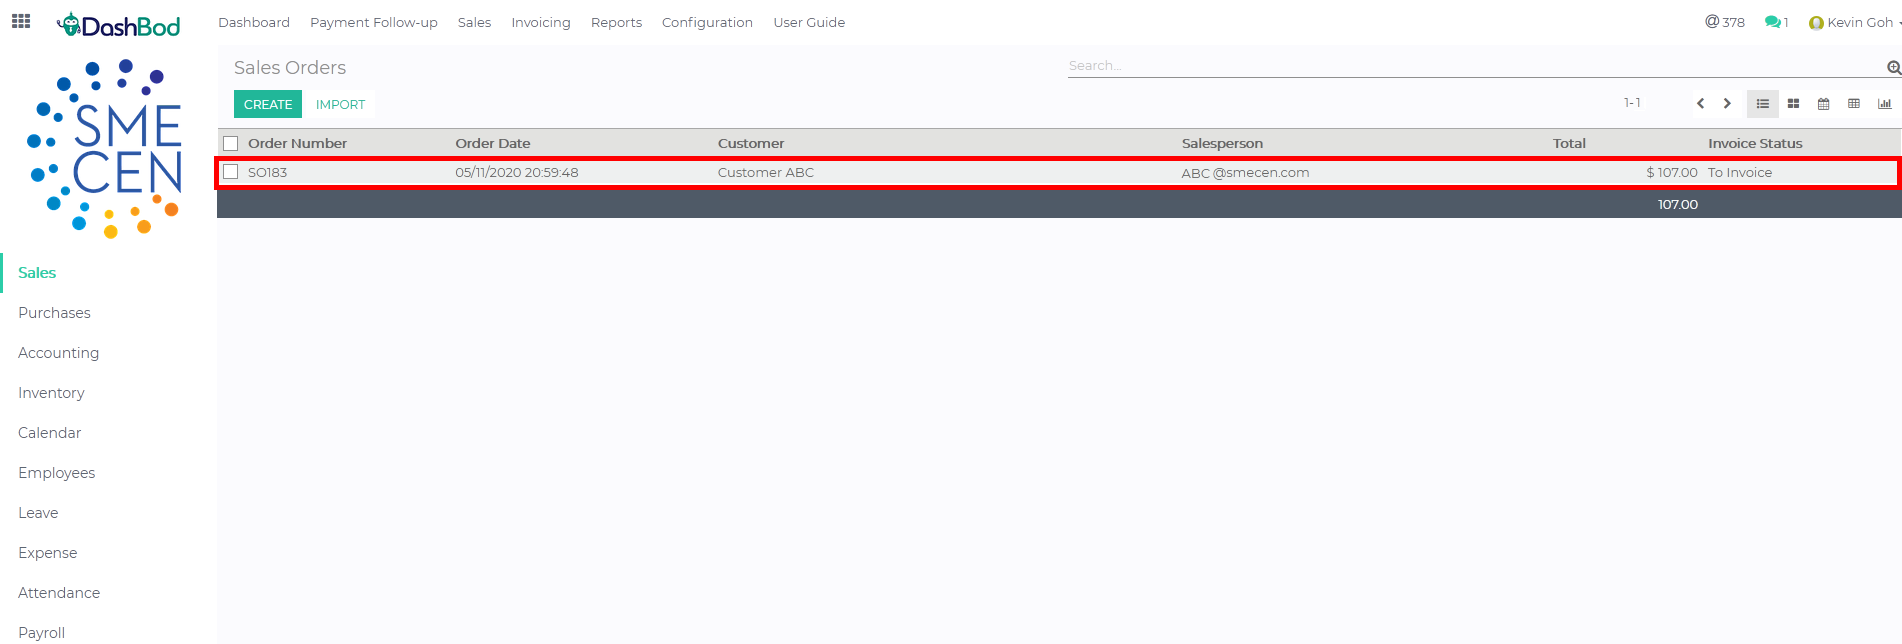
4. Click on the Sales Order you want to convert (Red Box)
5. Click Edit if you need to do any adjustments to the Sales Order (Optional) (Red Box)
6. Click Create Invoice once done (Blue Box)
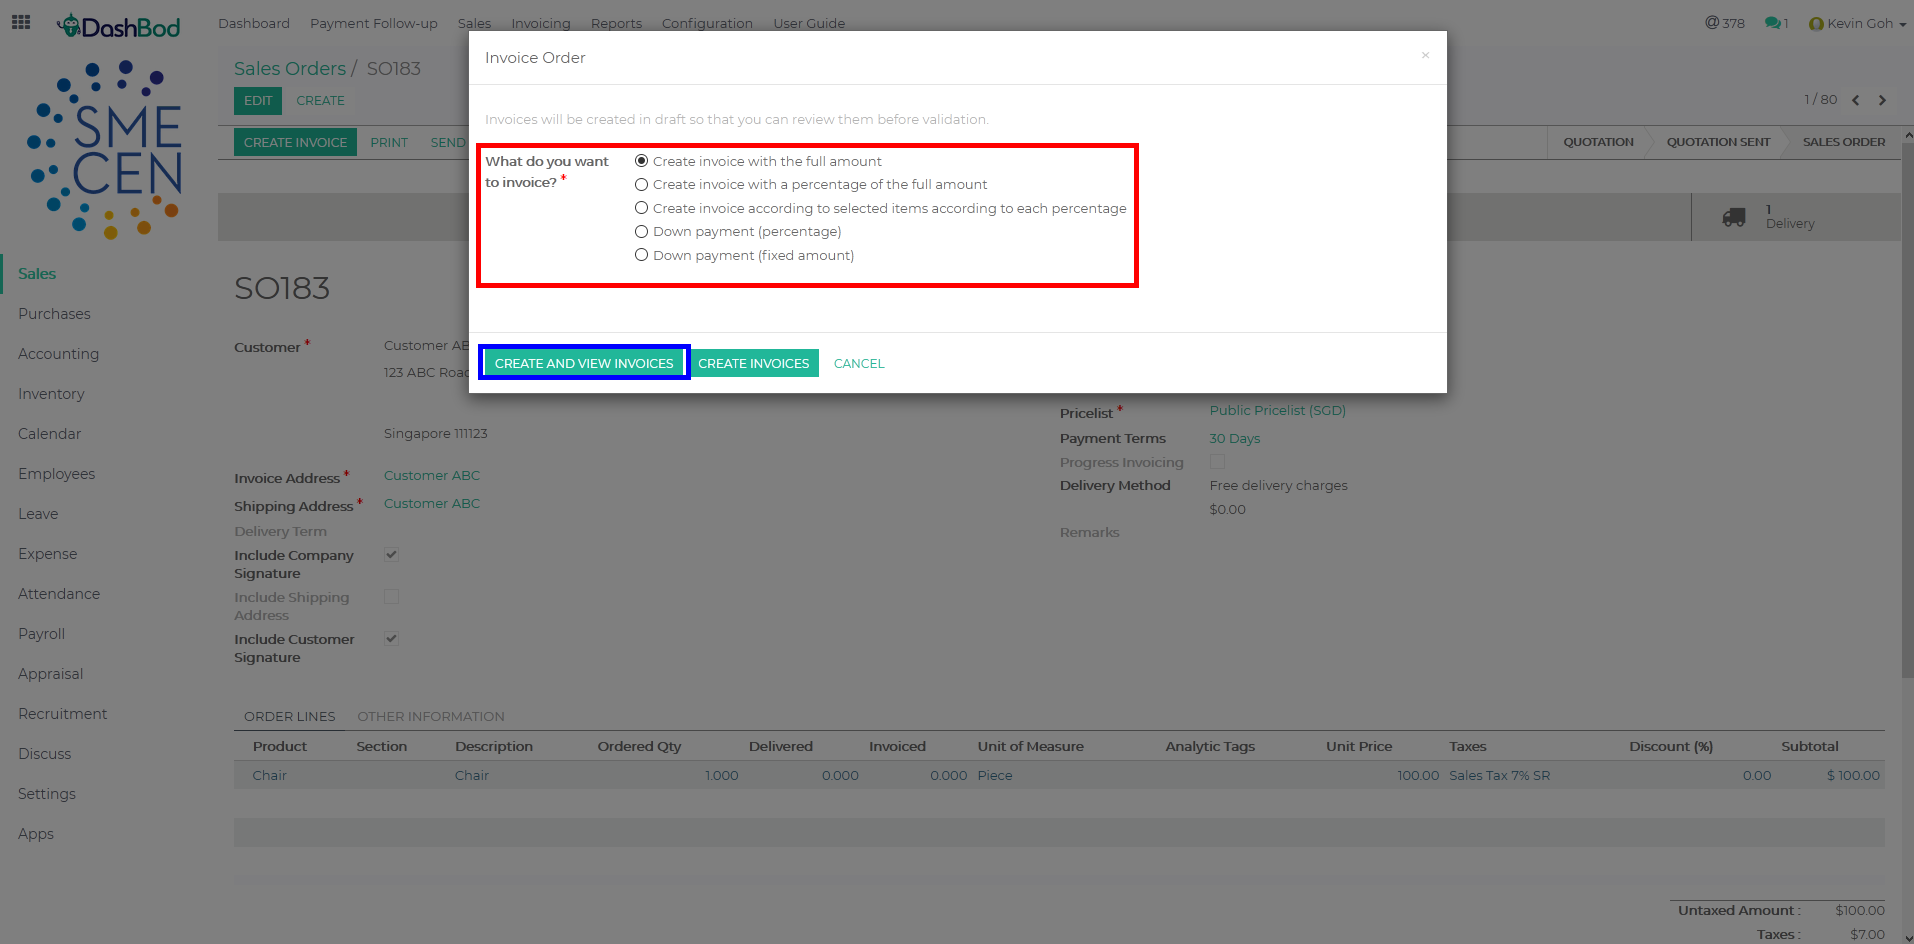
7. Select the type of invoicing (Red Box)
8. Click Create and View Invoices (Blue Box)
Validating the Invoice
9. Click Edit if you need to do any adjustments to the draft invoice (Red Box)
10. Click Validate once done (Blue Box)
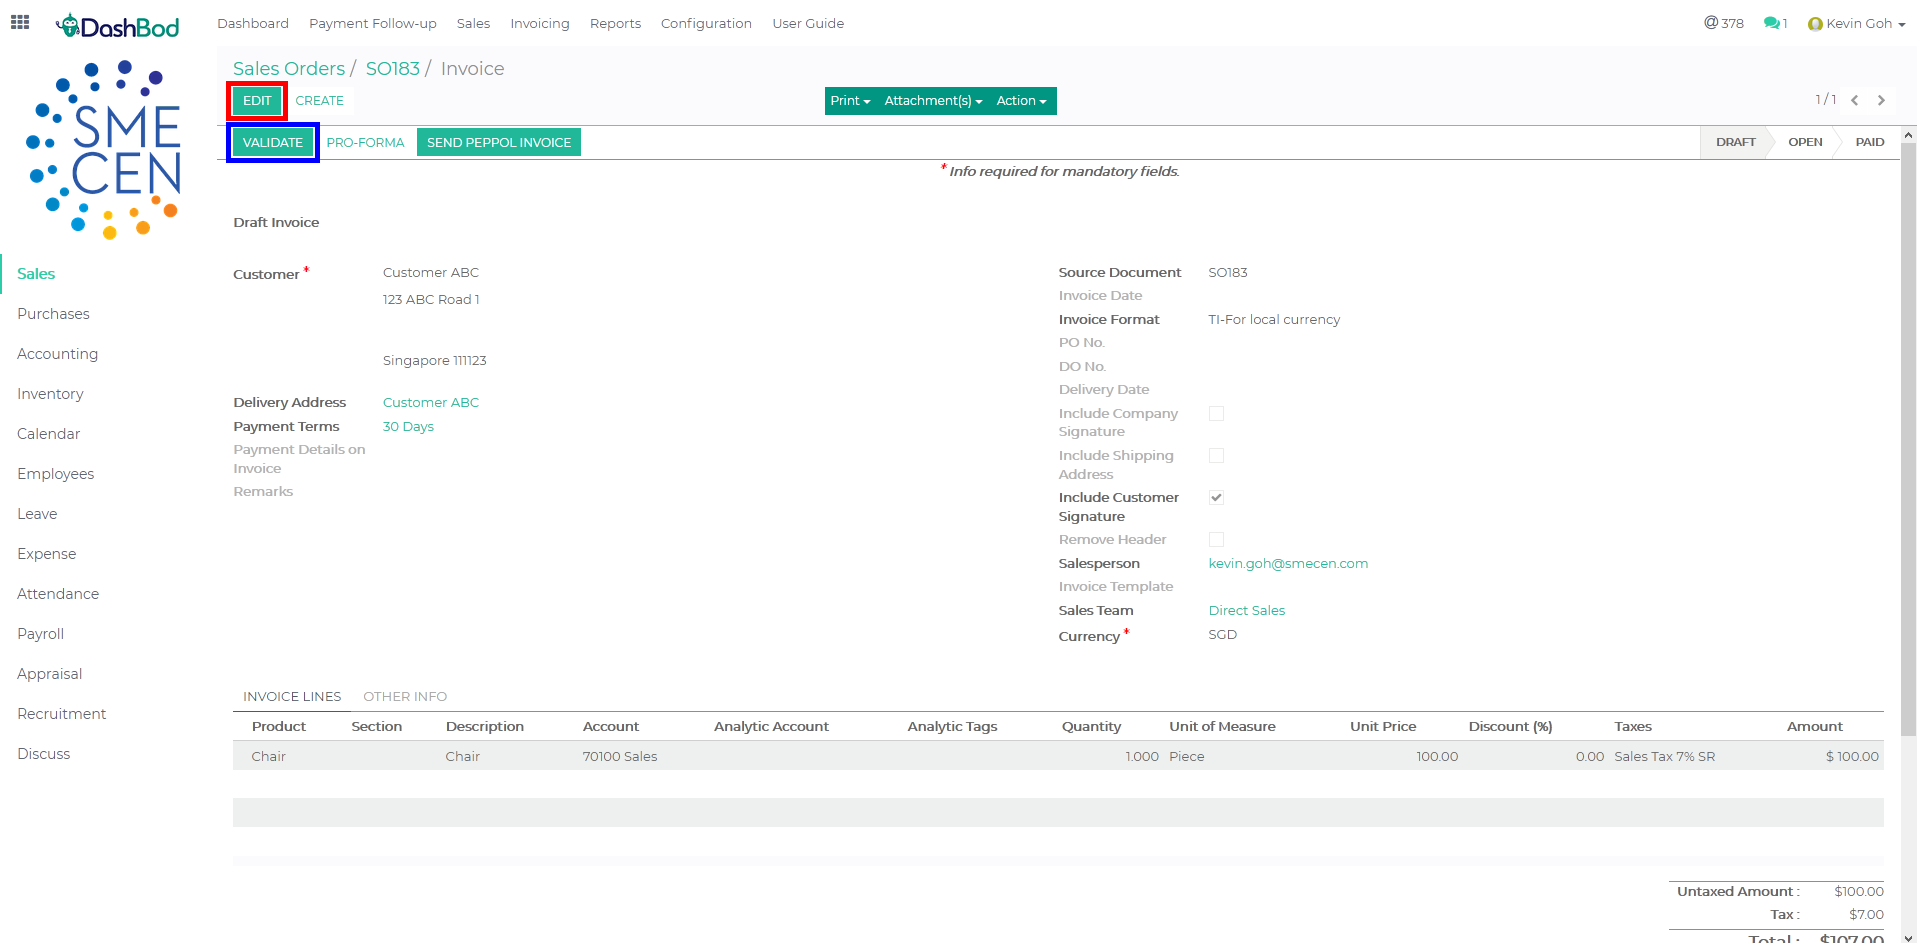 Note: Once the invoice has been validated, you will not be able to edit or delete. If you need to adjust a validated invoice, you need to cancel this invoice and redo it again.
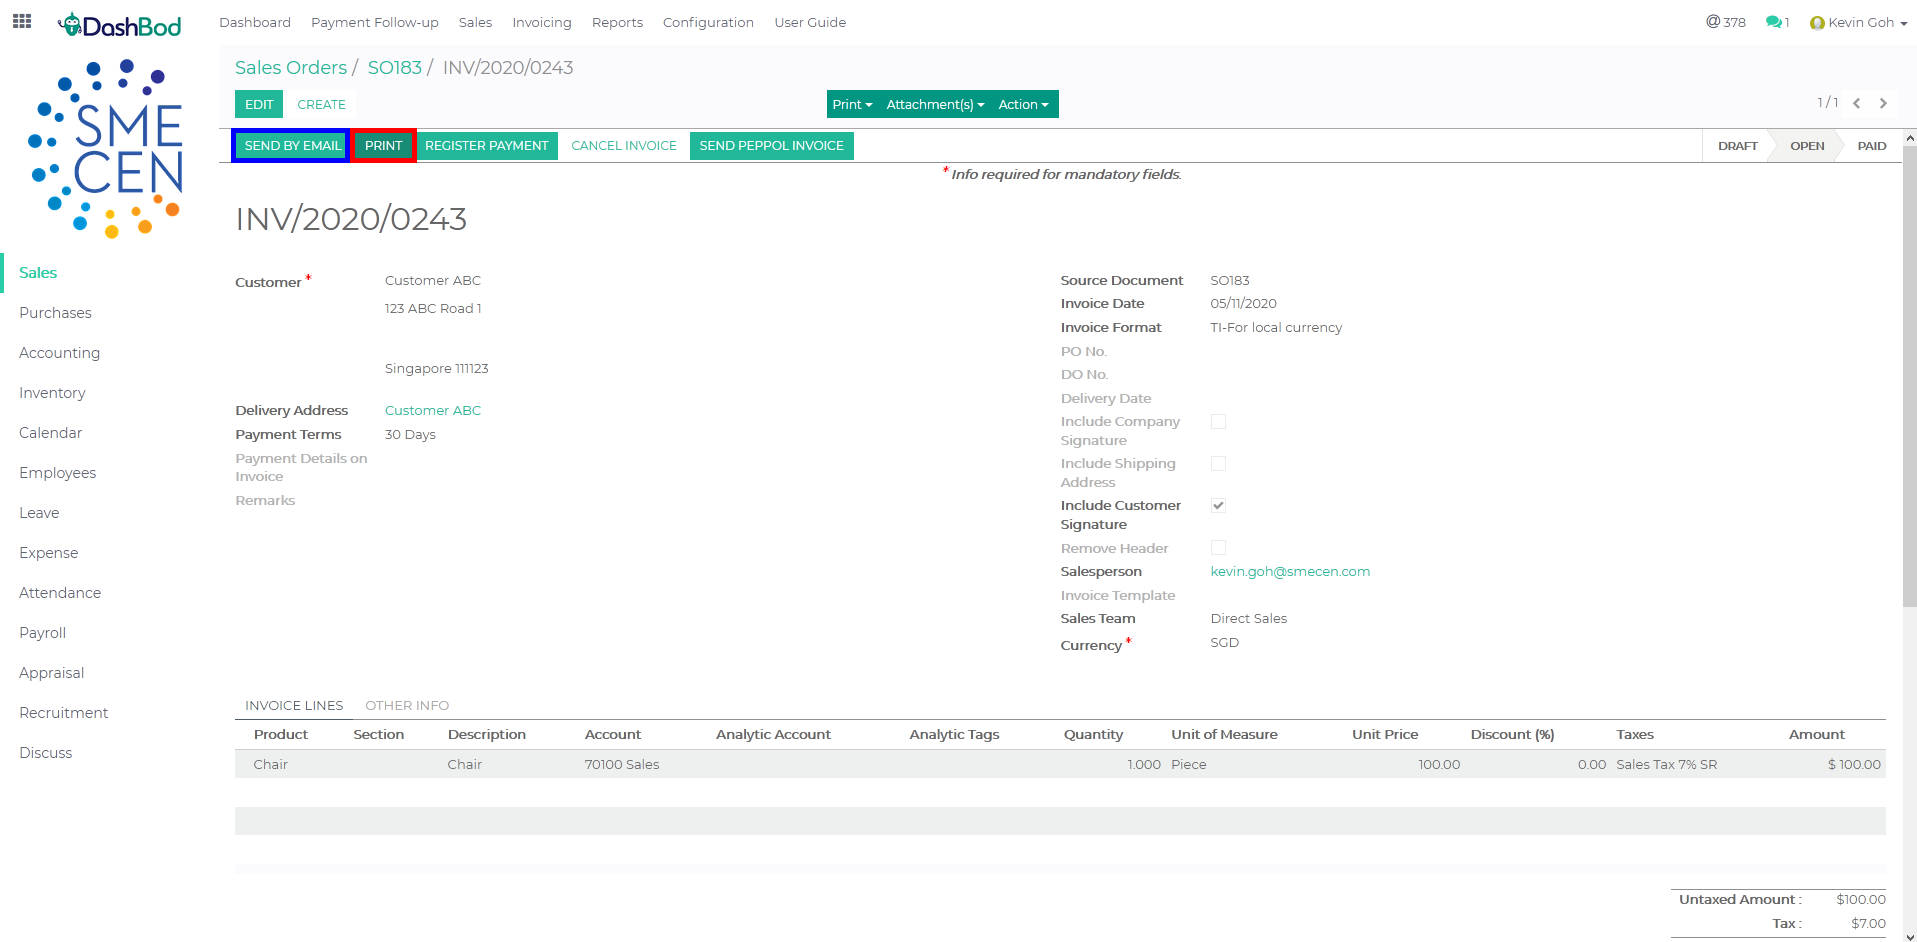
11. Click Print to print the invoice or to save it in PDF (Red Box)
12. Click Send by Email if you want to send the invoice via DashBod (Blue Box)
Note: An email will automatically be sent out to the Salesperson indicated on the invoice once it has been validated.
Creating an Invoice
Navigating to Invoice page
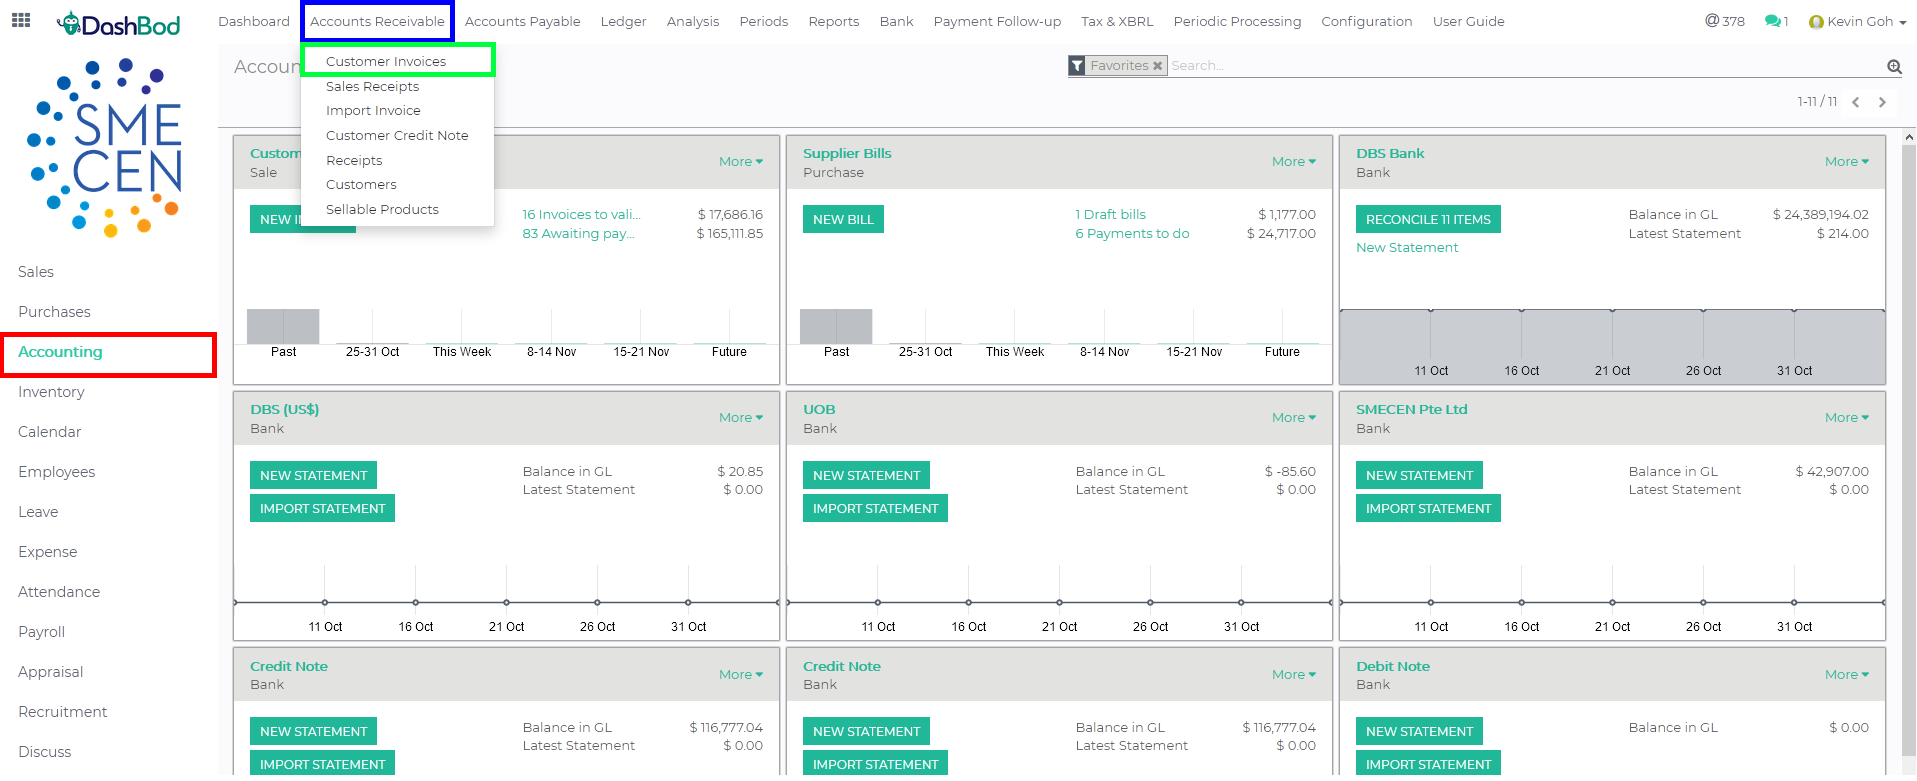
1. Click on Accounting at the left panel (Red Box)
2. Click on Accounts Receivable at the top bar (Blue Box)
3. Click on Customer Invoices (Green Box)
4. Click Create
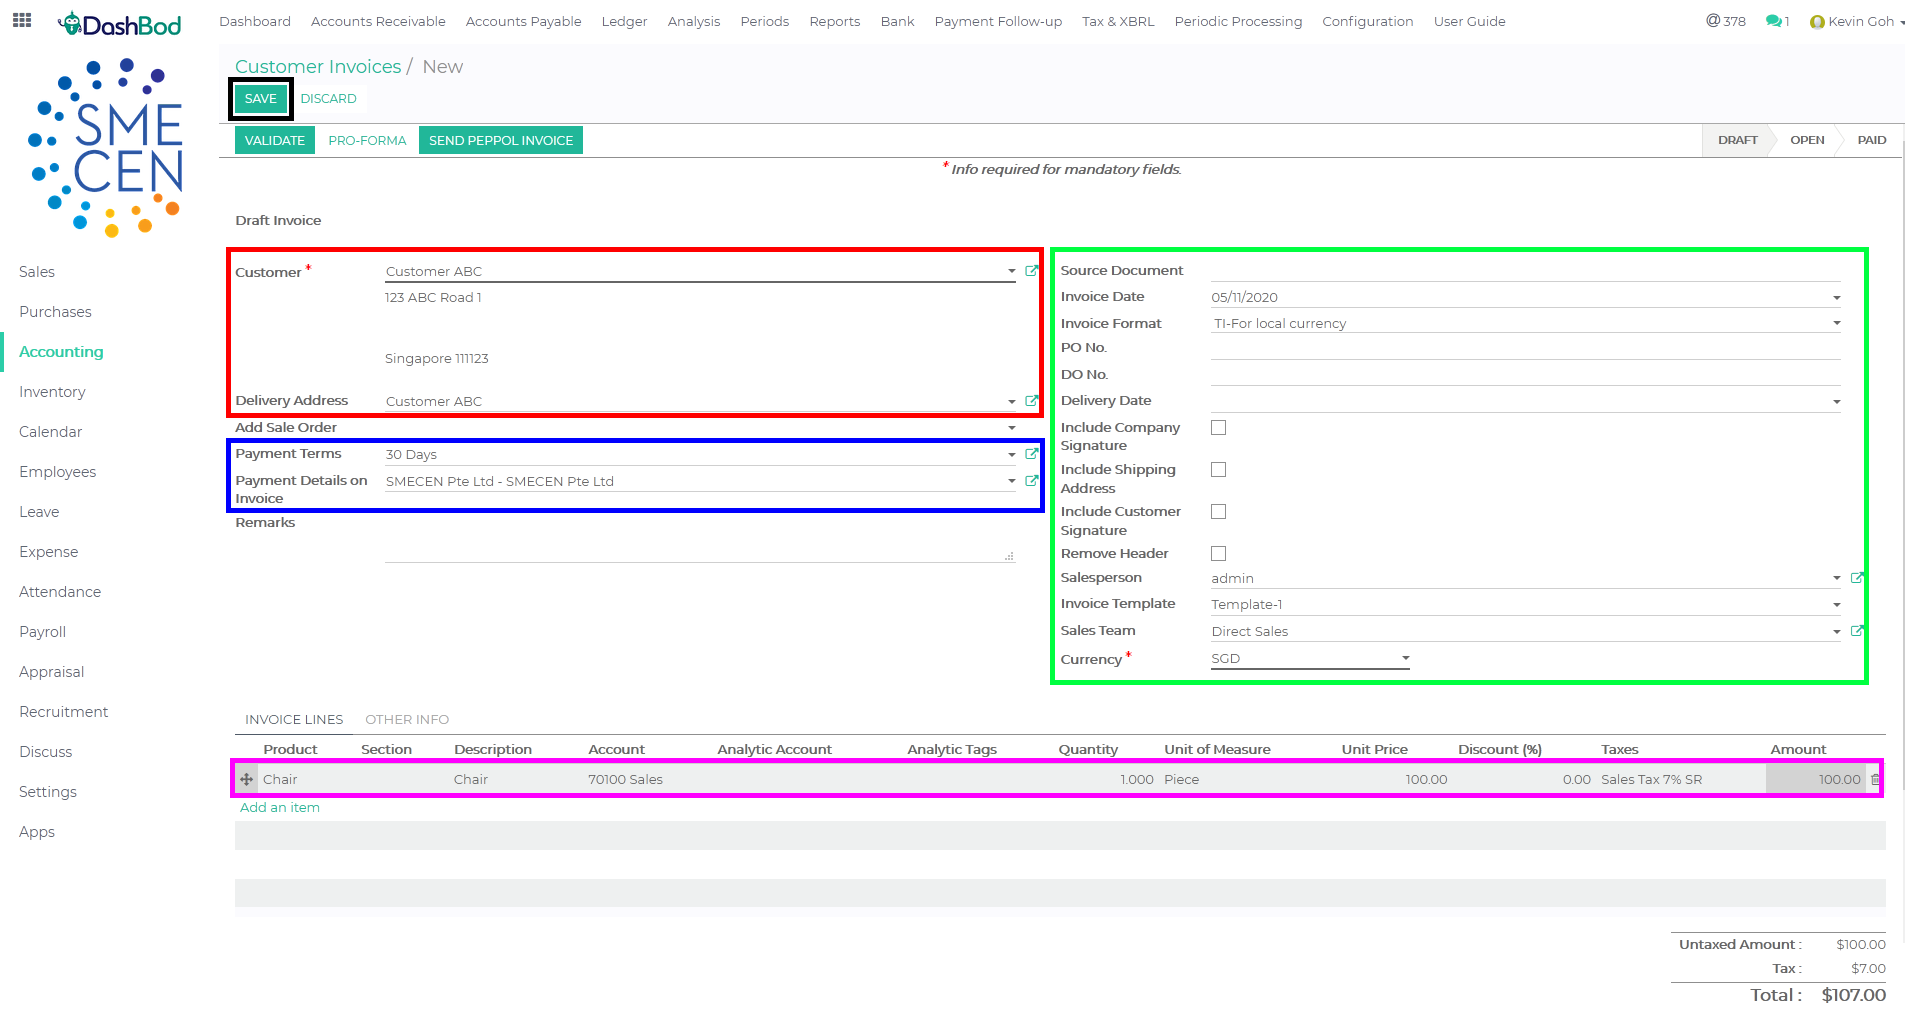
5. Fill in the details needed
-
- Customer Details (Red Box)
- Payment Details (Blue Box)
- Invoice Format and Currency (Green Box)
- Invoice Line Items (Pink Box)
6. Click Save once done (Black Box)
Validating the Invoice
7. Click Validate once done
Note: Once the invoice has been validated, you will not be able to edit or delete. If you need to adjust a validated invoice, you need to cancel this invoice and redo it again.
8. Click Print if print or save it as PDF (Red Box)
9. Click Send by Email if you want to send the Invoice via DashBod (Blue Box)
What’s Next
Now that you’ve created an Invoice, you might want to take a look at how to Register Payment from your Invoices into your General Ledger


