Introduction
Before you can start using Dashbod’s customer sales management features such as invoicing them or creating credit notes, you must first create your customer database in Dashbod.
This article covers how to import customer data in bulk, click here if you want to create a single customer.
Before you begin
Identify your customer’s basic data such as entity name, address, contact details and additional information such as PEPPOL ID, website and customer contact persons.
Download and fill up our before proceeding to the next step.
Navigating to your Customer Master
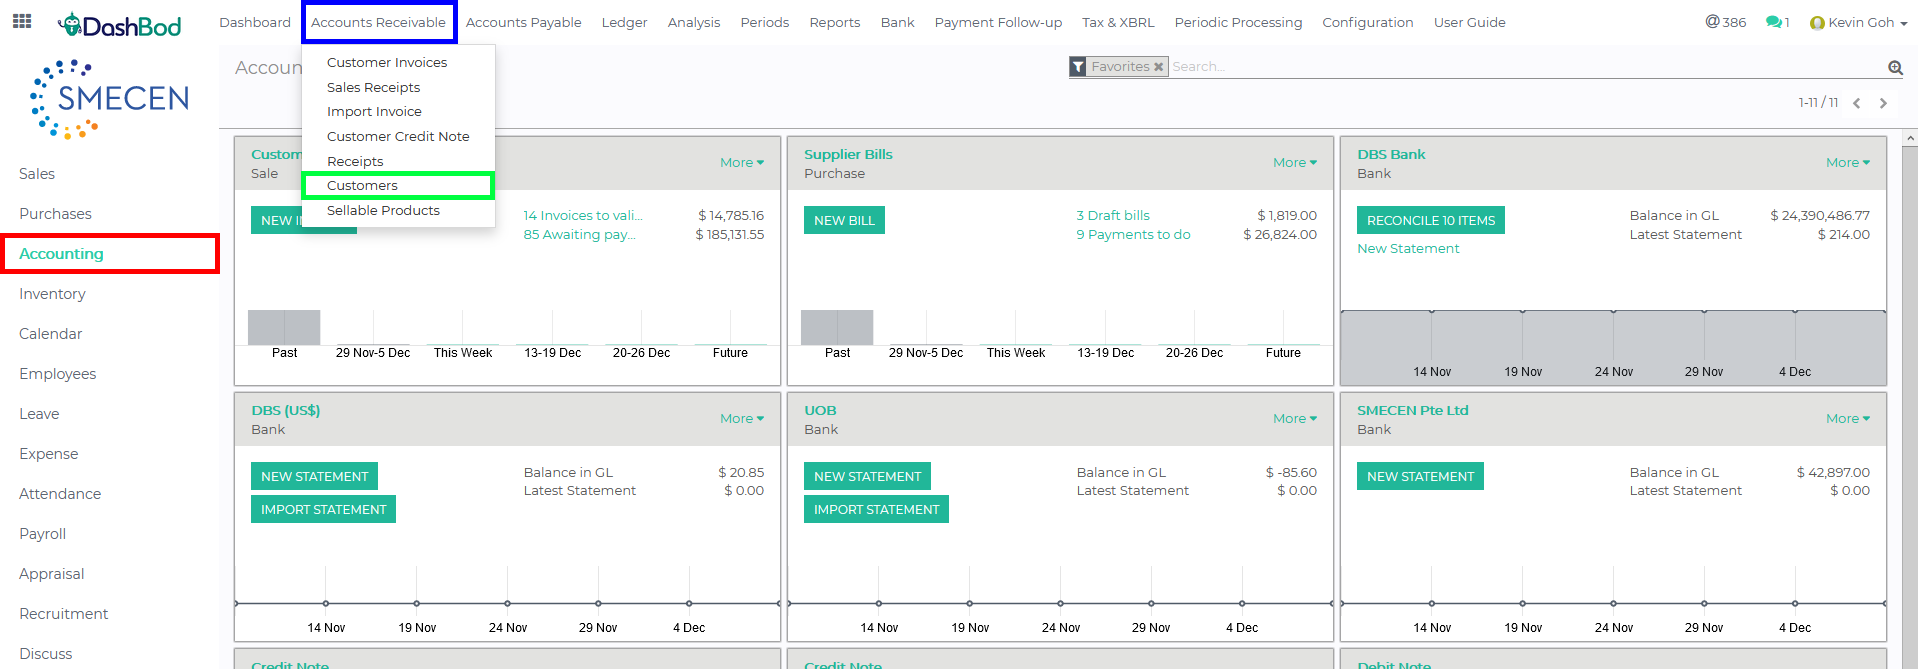
1. Click on Accounting at the left panel (Red Box)
2. Click on Accounts Receivable at the top bar (Blue Box)
3. Click on Customers (Green Box)
Importing and validating your customer master data file
4. Click on the list view icon ![]() (Red Box)
(Red Box)
5. Click Import (Blue Box)
5. Click Load File (Red Box)
6. Select your Customer Master Template file (The file must be in .xls or .csv)
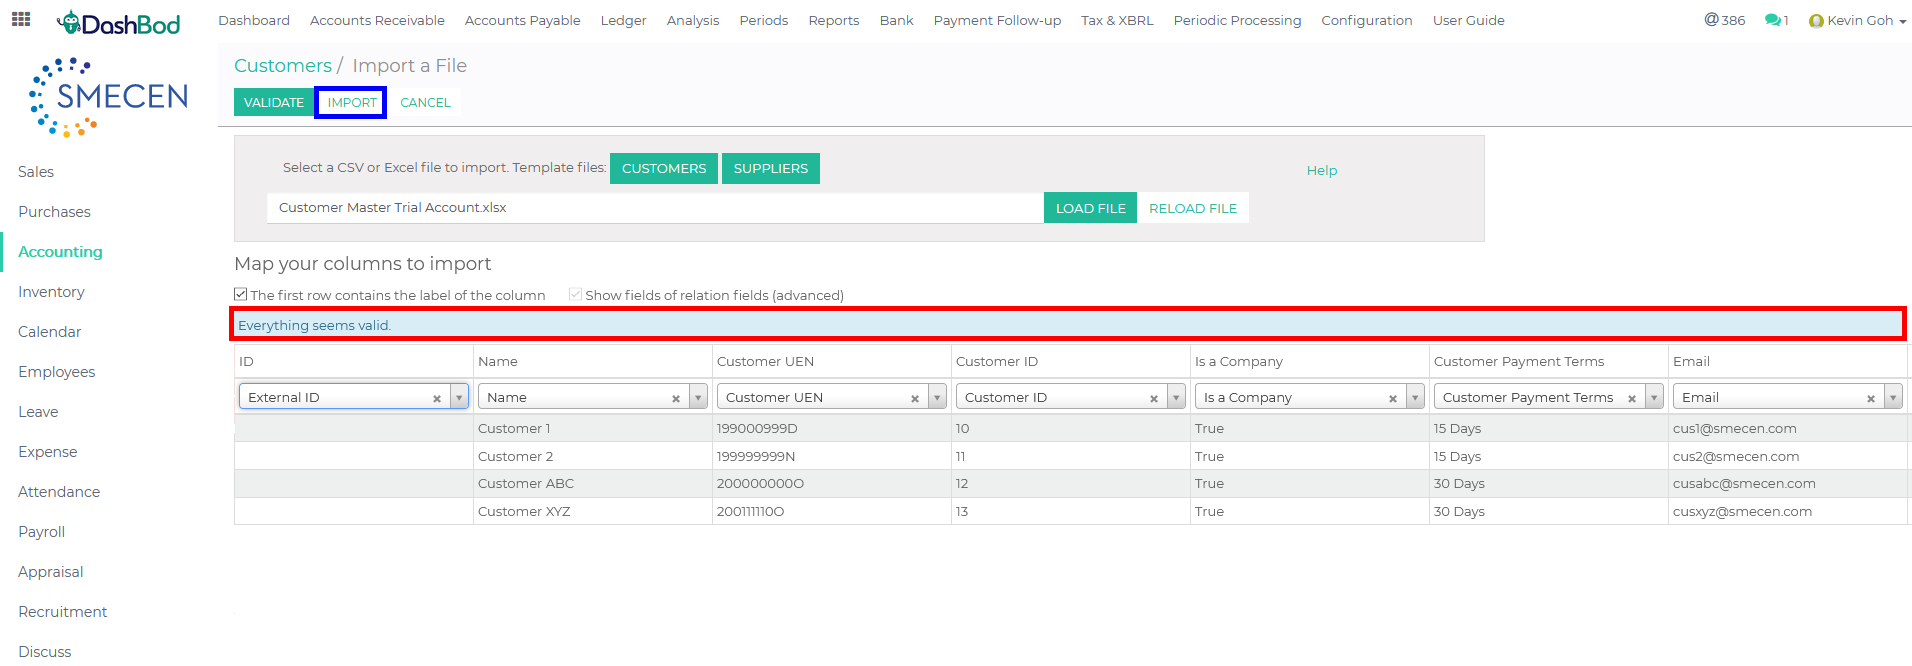
7. Click on Validate (Blue Box)
Note: Scroll to the left to check all headers are accepted by the system.
8. As seen in the Red Box, after validating, a system prompt will appear to indicate whether there is a data mismatch or the imports have been successfully validated. (Red Box)
9. Click Import (Blue Box)
What’s Next
Now that you have completed importing customer data, import Supplier/Vendor Data or your Product Listing.
If you have done the above, start on your creating your Chart of Accounts.


