Introduction
One of the most commonly used features by employees is the leave application feature.
Managing leave using the DashBod HR app becomes even more convenient for managers as they can do so on the go.
There are 2 steps that must be taken for the leave to be fully approved:
- Approve
- Validate
Before you begin
This feature is only available for users with the following roles:
- Superadmin
- HR
Note: Line Managers will only be able to “Approve” leave, but will not be able to “Validate” it.
How it works
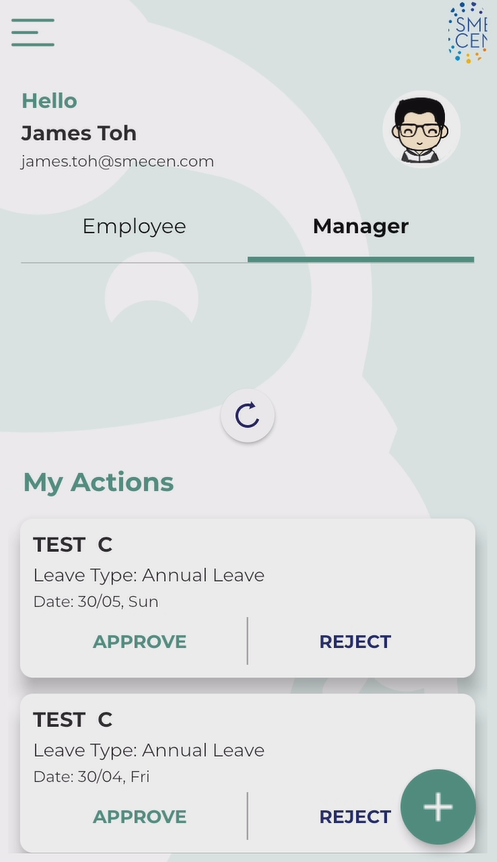
1. Navigate to the ”Manager” tab to view leave that require approval.
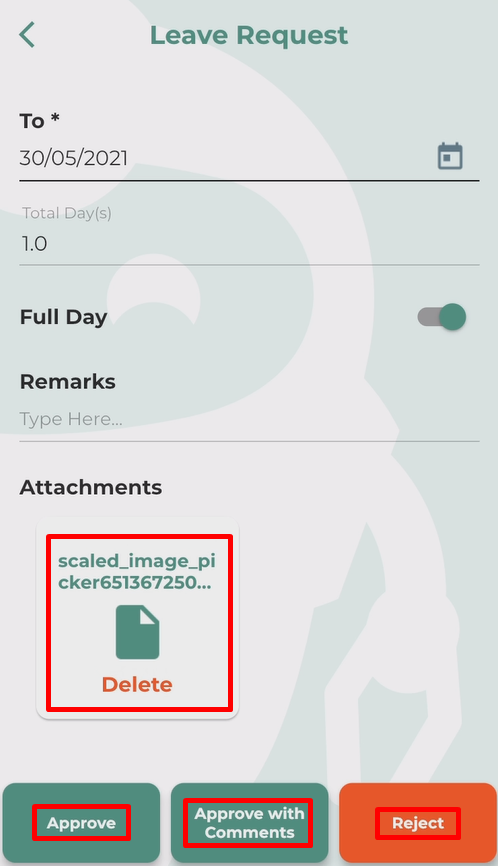
2. Next, click to view any attachments that may have been included.
3. Click on ”Approve“, “Approve with Comments” or “Reject”.
- Approve: Expense will be approved immediately.
- Approve with Comments: Expense will be approved after adding comments for the employee to view.
- Reject: Expense will be rejected immediately.
4. After clicking on one of the options, you will see a confirmation screen stating whether the leave has been approved or rejected.
Note: The leave still has to be validated after approval.
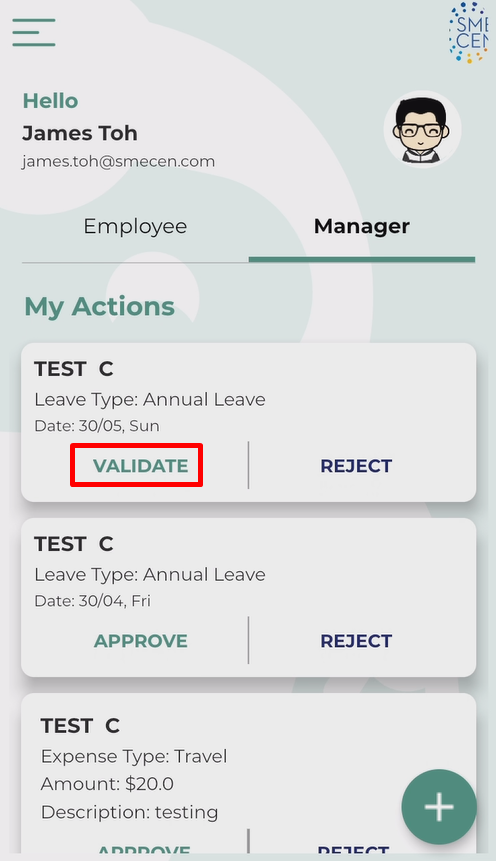
5. Next, refresh the manager tab in the home page by dragging down on the screen.
6. After refreshing, the “Approve” button will be changed to “Validate“, which is the final level of clearance.
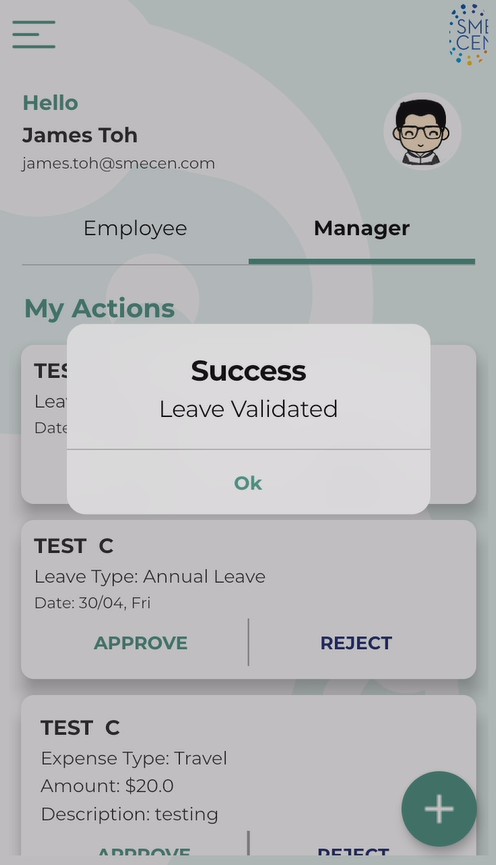
7. After clicking “Validate”, the following success page will appear.
What’s next
Learn how to Approve an Expense Claim on the DashBod app.


