Introduction
This article covers the steps to cancel an invoice as DashBod does not support further editing or changes to the invoice once it is being validated/posted. This is to prevent management override and provide more credibility and reliability to the users.
Before you begin
Please do note that this article is to cancel a paid invoice. There are different steps to take if the invoice is open or paid. Please refer below the status bar to check if your invoice is at which stage.
An invoice should be cancelled when it has been processed wrongly in the system. Once cancelled, the system will automatically trigger a reversal journal entry to offset its previous journal entry recorded for the erroneous invoice. After the payment has been unlinked from the invoice, you can choose to either debit this payment into another invoice or cancel this payment.
Checking your Invoice Status
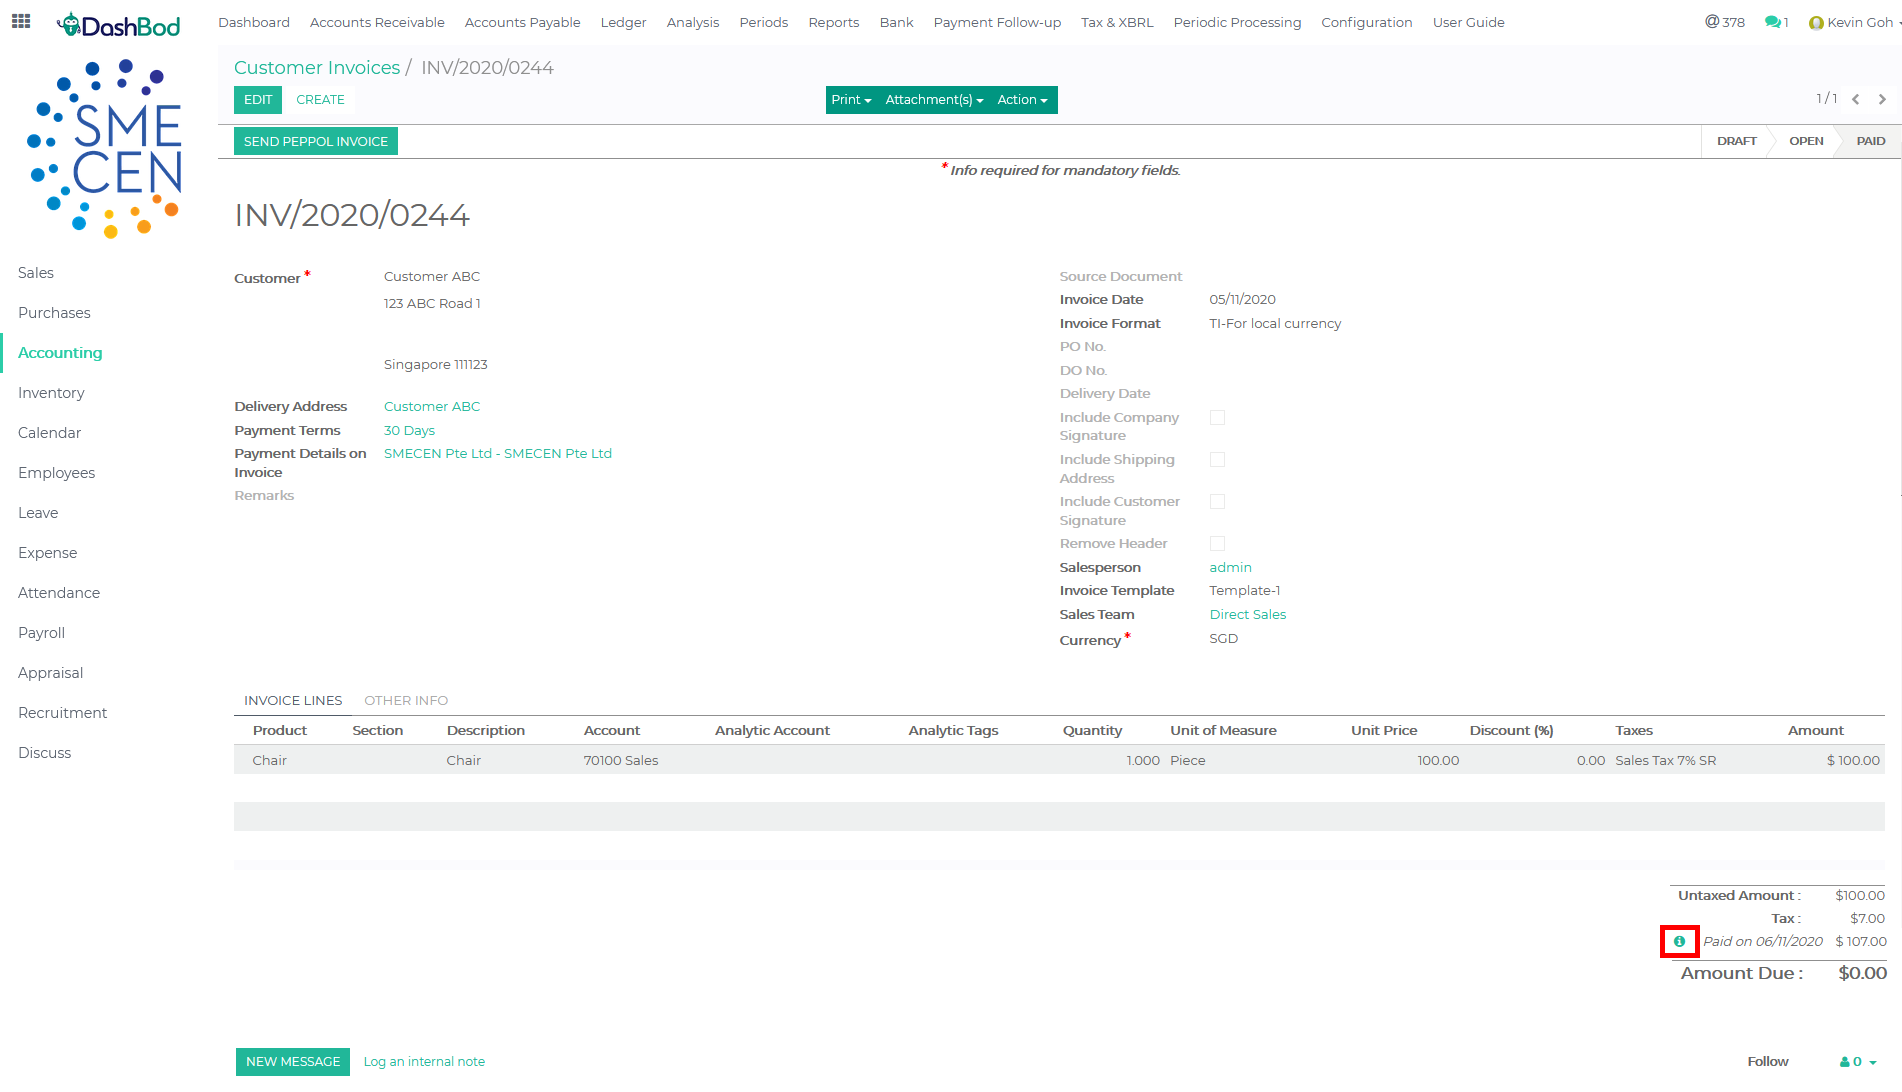
The status bar is shown in the screenshot below. (Red Box)
- Draft – Invoice can be edited or deleted
- Open – Invoice has been confirmed and posted and not able to edit or delete
- Paid – Invoice has been paid and not able to edit or delete
- Cancelled – Invoice has been cancelled not able to edit or delete
Navigating to Customer Invoice page
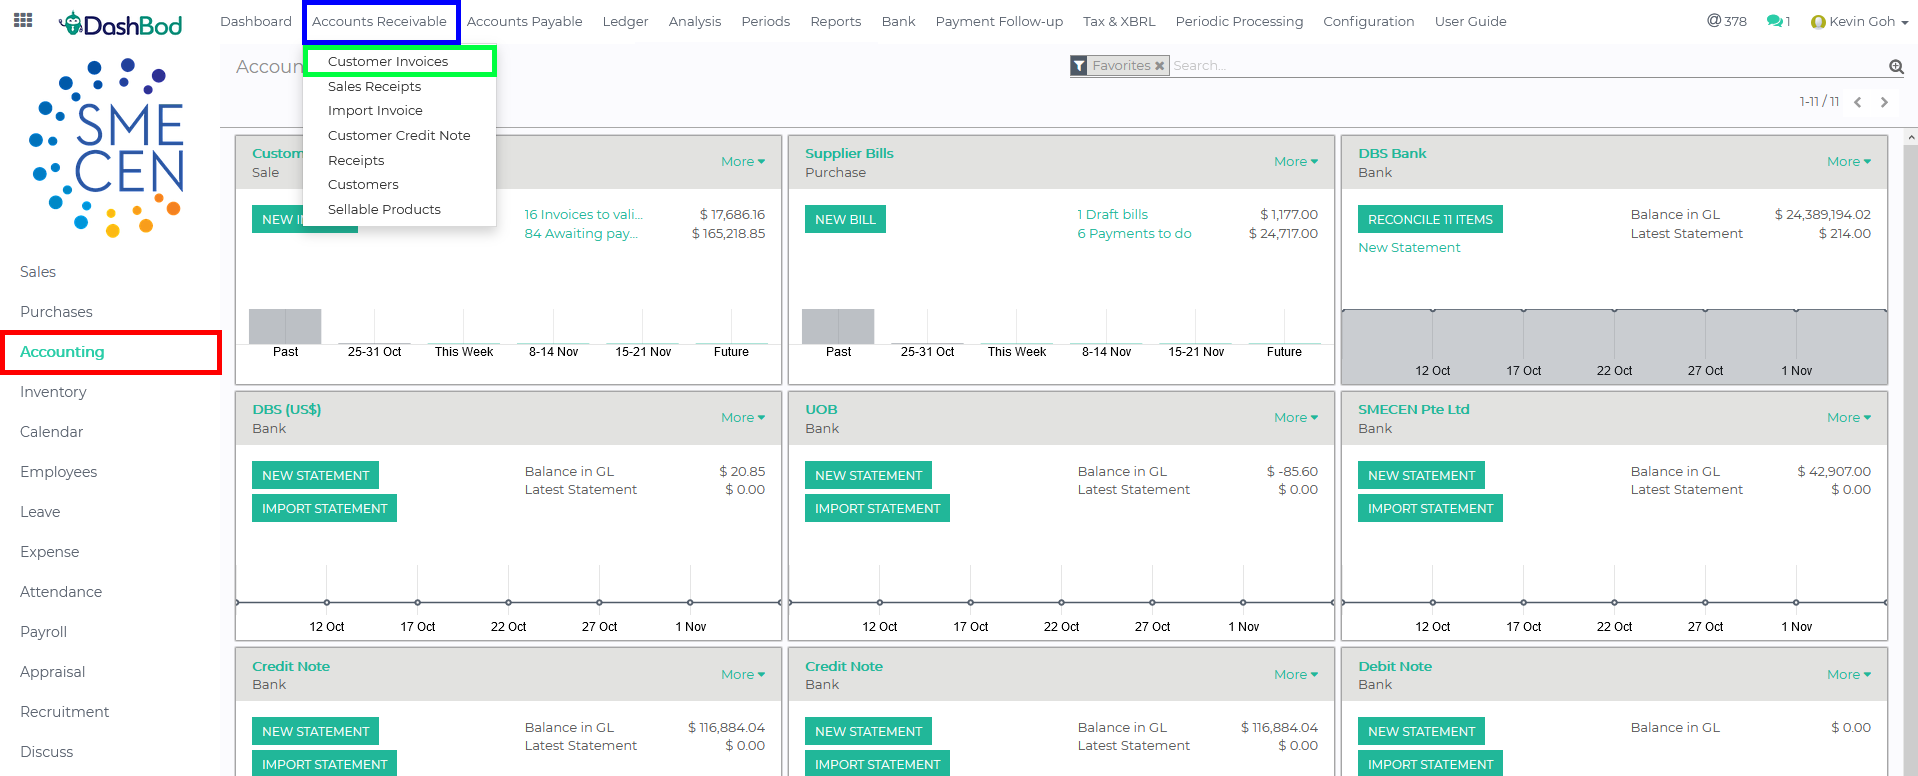
1. Click on Accounting at the left panel (Red Box)
2. Click on Accounts Receivable at the top bar (Blue Box)
3. Click on Customer Invoices (Green Box)
4. Select the Invoice that you want to cancel (Red Box)
Un-linking Payment from the Invoice
5. Click on the icon (![]() ) to un-link the payment (Red Box)
) to un-link the payment (Red Box)
Cancelling the Invoice
6. Please ensure that your invoice status has changed to Open and there is outstanding credit or debit is shown below the amount due (Red Boxes)
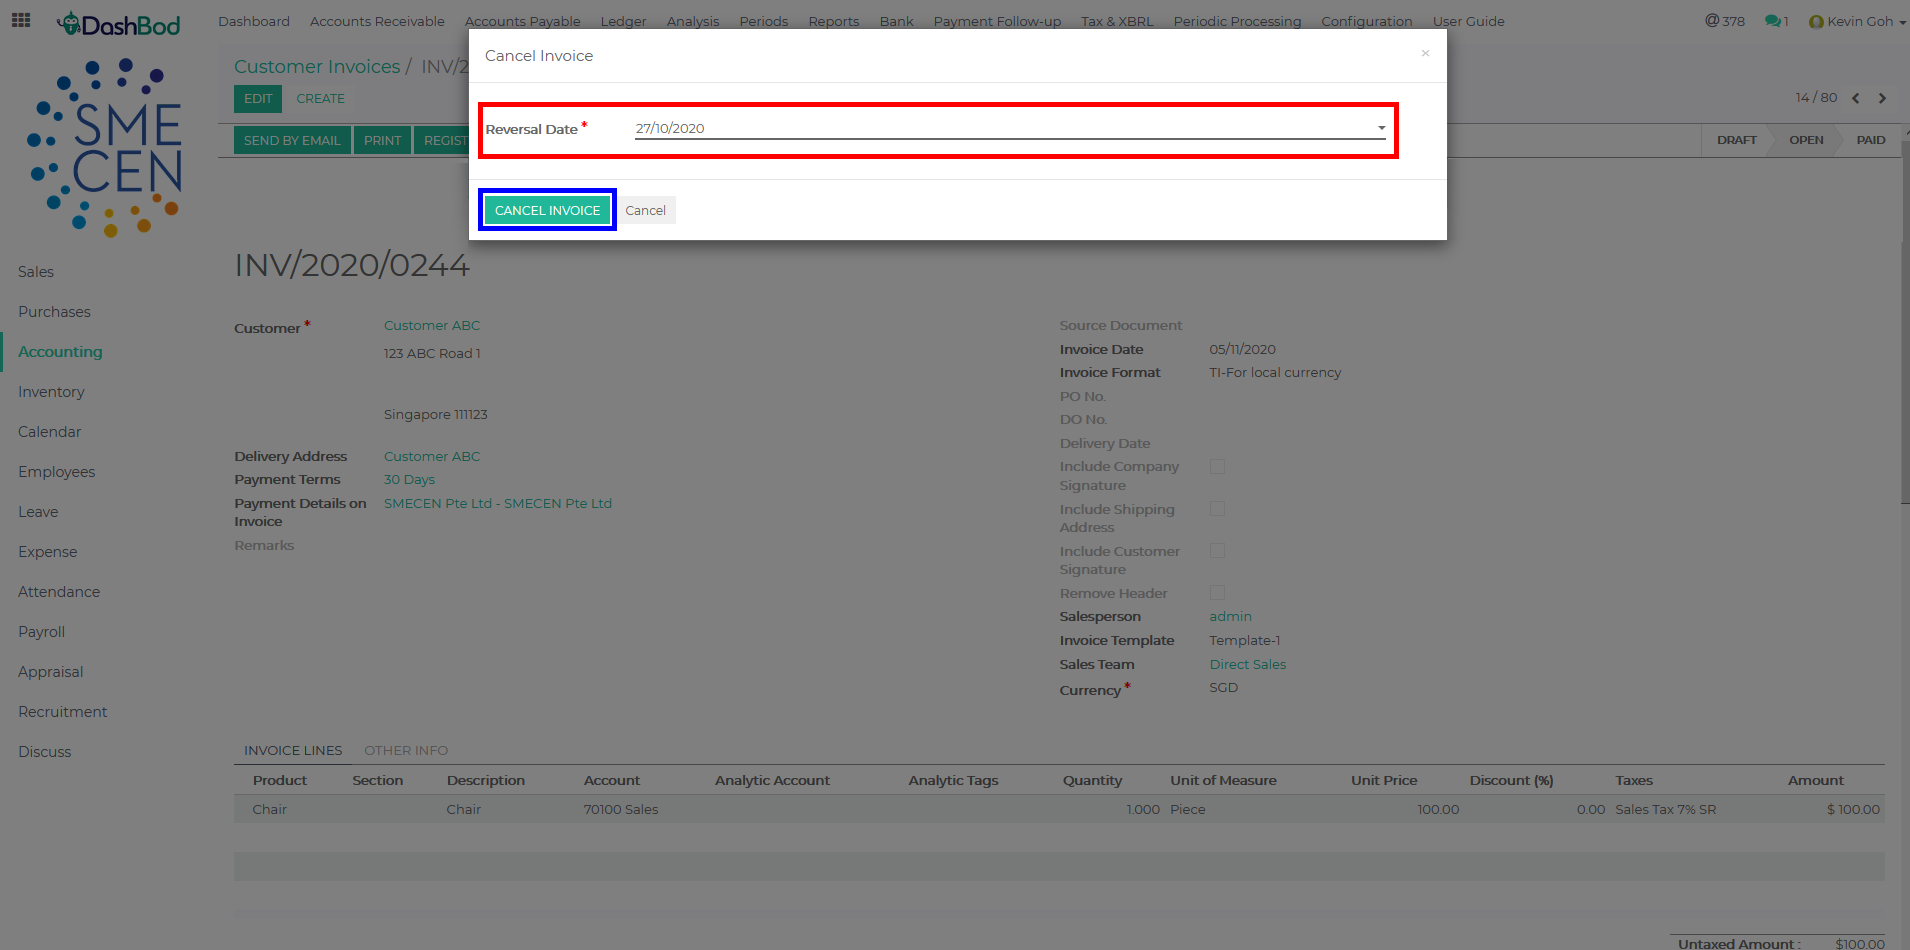
7. Click Cancel Invoice (Blue Box)
8. Change the Reversal Date (Red Box)
9. Click Cancel Invoice (Blue Box)
Note: The cancellation of invoice will automatically create a reversal in the Journal Entry.
What’s Next
Now that you have cancelled the invoice, check out how to issue recurring or progressive invoices to your customers next.


